A Tie Rod Hydraulic Cylinder is designed for easy disassembly and maintenance, making it one of the most repairable linear actuators in industry. Over time, seals wear out, rods may score, or internal leakage can develop. Learning how to repair a tie rod hydraulic cylinder saves money, reduces downtime, and extends equipment life. In this guide, we will walk you through the step-by-step repair process. For a detailed understanding of this cylinder type, refer to our guide on What Is a Tie Rod Hydraulic Cylinder?.
1. Safety Preparation and Removal
Before repairing any Tie Rod Hydraulic Cylinder, relieve hydraulic system pressure completely. Shut down the power unit, cycle the control valve, and disconnect the hoses (label them for reassembly). Use proper lifting gear to remove the cylinder. Place it on a clean workbench. For an industrial tie rod cylinder, additional support may be needed due to its weight.
2. Disassembly – Removing the Tie Rod Nuts
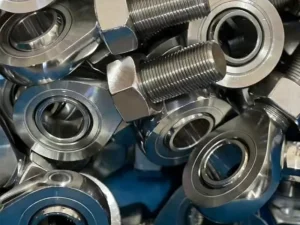
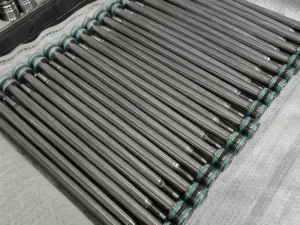
The defining feature of a Tie Rod Hydraulic Cylinder is the external tie rods. Use a wrench to loosen the tie rod nuts. Always follow a star pattern to prevent warping the end caps. Once all nuts are removed, slide the end caps off the tie rods. A NFPA hydraulic cylinder typically has four tie rods, but larger sizes may have six or eight.
3. Extracting the Piston and Rod Assembly
After removing the end caps, carefully pull the piston and rod assembly out of the barrel. Avoid scratching the barrel’s honed surface. If the assembly is stuck, use a brass punch or a soft faced hammer on the rod end. For a long stroke tie rod cylinder, extra care is needed due to the extended rod length.
4. Disassembling the Piston and Gland
Secure the piston rod in a soft-jaw vise. Remove the piston nut (some are staked or have Loctite – apply heat if needed). Slide the piston off the rod. Then slide the gland (head) off the rod. Now you have full access to all seals. A stainless steel tie rod cylinder requires careful handling to avoid damaging the corrosion-resistant surface.
5. Inspecting Components for Damage
Before installing new seals, inspect every part:
Rod: Check for scoring, bending, or chrome flaking. Minor scratches can be polished; deep gouges require rod replacement or re chroming.
Barrel: Look for scoring, pitting, or out-of-round. A low profile tie rod cylinder (designed for tight spaces) may be more prone to bending if side loads are present.
Piston and gland: Check for cracks or excessive wear.
Tie rods: Inspect threads for damage.
6.Removing Old Seals and Cleaning
Remove all old seals, backup rings, wipers, and wear rings from the piston and gland. Use plastic picks to avoid scratching seal grooves. Clean the barrel, rod, piston, and gland with solvent and lint-free cloths. Blow out oil passages with compressed air. Thorough cleaning is essential for a successful repair of any Tie Rod Hydraulic Cylinder.
7. Installing New Seals
Lubricate new seals with clean hydraulic fluid or assembly gel. Install rod seals, piston seals, wipers, O-rings, and backup rings in their respective grooves. Ensure each seal sits squarely without twisting. For piston seals, use an installation sleeve to protect them from sharp edges. A metric hydraulic cylinder follows ISO dimensions, but the seal installation procedure is identical.
8. Reassembling the Cylinder
Slide the gland onto the rod, then the piston. Torque the piston nut to manufacturer specification. Lubricate the barrel interior and carefully insert the rod assembly. Install the end caps and hand tighten the tie rod nuts. Then torque the tie rod nuts in a star pattern to the specified value. Over-torquing can distort the barrel; under torquing leads to leaks.
9. Testing After Repair
Reinstall the Tie Rod Hydraulic Cylinder on the equipment. Reconnect hoses and fill with clean fluid. Run the system at low pressure first to purge air. Cycle the cylinder several times, checking for:
External leaks at the gland and tie rod nuts
Smooth, chatter free motion
Proper speed and force
Unusual noises
10. Common Mistakes to Avoid
Using the wrong seal kit – always match bore, rod size, and seal material.
Mixing up tie rod nuts – keep them in order; they may have different thread pitches.
Skipping the star pattern – causes uneven clamping and leaks.
Forgetting to lubricate seals – leads to tearing during assembly.
Not testing after repair – confirms the job is done right.
Conclusion
Repairing a Tie Rod Hydraulic Cylinder is a straightforward process if you follow the correct steps: safe removal, disassembly, inspection, cleaning, seal replacement, careful reassembly, and testing. Whether you work with an industrial tie rod cylinder, NFPA hydraulic cylinder, long stroke tie rod cylinder, stainless steel tie rod cylinder, low profile tie rod cylinder, or metric hydraulic cylinder, the procedure is essentially the same. Mastering these repairs saves your facility time and money. For foundational knowledge on this cylinder type, revisit What Is a Tie Rod Hydraulic Cylinder?. With practice and attention to detail, you can confidently restore any tie rod cylinder to like new condition.