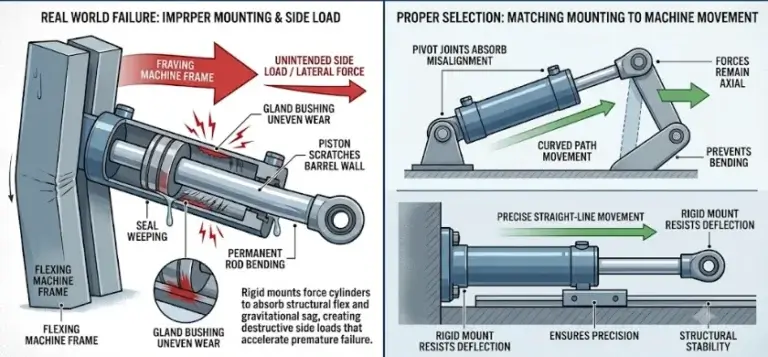
Disassembling a hydraulic cylinder is often necessary for seal replacement, inspection, or rebuild. While the task requires care and the right tools, following a systematic procedure makes it safe and straightforward. In this guide, we will walk you through the step-by-step process of taking apart a hydraulic cylinder without damaging precision components. Before starting, ensure you have read our guide on how to bleed a hydraulic cylinder to understand the complete maintenance cycle.
1. Safety First – Relieve Pressure and Prepare
Before touching any hydraulic cylinder, relieve all system pressure. Shut down the power unit, cycle the control valve several times, and disconnect the hydraulic lines. Label each hose for reassembly. Wear safety glasses and gloves. Place the hydraulic cylinder on a clean workbench with soft jaws or V blocks. For a hydraulic piston cylinder, note that trapped pressure can exist even after disconnection – always crack a fitting slowly.
2. Remove the Cylinder from Equipment
If the hydraulic cylinder is still mounted, use proper lifting gear to remove it. Support the equipment securely. For a hydraulic ram cylinder on a press or heavy machine, ensure the load is mechanically locked. Once removed, clean the exterior thoroughly to prevent contamination during disassembly.
3. Extend the Rod Fully
Extend the piston rod completely. This positions the piston near the gland, making it easier to access internal components. For a hydraulic lift cylinder on a forklift or scissor lift, extend the rod before removal if possible. A fully extended hydraulic cylinder also allows you to inspect the rod surface for scoring or bending before disassembly.
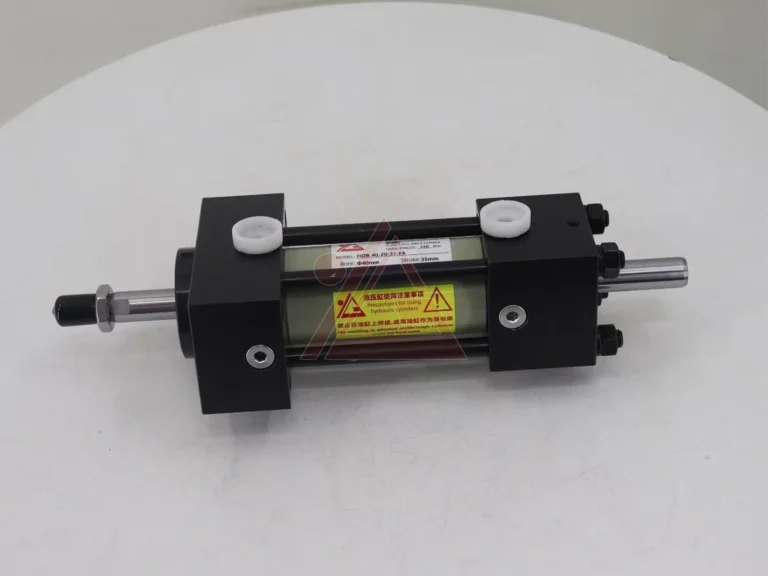
4. Remove the Gland Nut or Retaining Ring
Most hydraulic cylinder designs use a gland nut (threaded) or a retaining ring (snap ring) to hold the gland in place. Use a spanner wrench or a pin wrench for gland nuts. For large cylinders, a special socket may be needed. Remove the retaining ring with external snap ring pliers. If the gland is stuck, apply gentle heat (not a torch) or use a brass punch. Never hammer directly on the rod or barrel.
5. Extract the Rod and Piston Assembly
Once the gland is free, carefully pull the rod and piston assembly out of the barrel. For heavy assemblies, use a slide hammer or a pulling fixture. Keep the rod aligned to avoid scratching the barrel’s inner surface. As you withdraw the assembly, the gland will slide off the rod. Set the rod aside on soft supports. For a dump trailer hydraulic cylinder, the rod is often long and heavy – get assistance if needed.
6. Remove the Gland from the Rod
The gland (head) contains rod seals, wipers, and bearings. Slide it off the rod end. If the gland has internal components that need replacement, you can disassemble it further later. For a hydraulic cylinder for scissor lift, the gland may have additional wear rings due to side loading. Inspect the gland bore for scratches.
7. Secure the Piston and Remove the Piston Nut
The piston is attached to the rod by a piston nut. Clamp the rod in soft jawed vise (protect the chrome surface). Use a wrench to loosen the piston nut. Some nuts are staked or have Loctite – apply heat if necessary. Once loose, unscrew the nut and remove the piston. For a hydraulic cylinder for forklift, the piston may have multiple seals and wear rings. Note the order of components.
8. Remove Old Seals and Clean All Parts
Now the hydraulic cylinder is fully disassembled. Remove old seals, backup rings, and wear rings from the piston and gland. Use plastic or brass picks to avoid scratching grooves. Clean the barrel, rod, piston, and gland with solvent and lint free cloths. Blow out passages with compressed air. Inspect every component for scoring, pitting, or out of round conditions. A clean disassembly is the foundation of a reliable rebuild.
9. Document and Organize Components
As you disassemble the hydraulic cylinder, take photos or make notes of seal orientation and component order. Place parts in labeled containers. This documentation is invaluable when you later replace seals or order a seal kit. For hydraulic piston cylinder and hydraulic ram cylinder designs, the seal arrangement may differ – referencing your notes prevents mistakes.
10. Common Disassembly Mistakes to Avoid
Forcing stuck parts with steel tools – use brass or aluminum.
Damaging rod chrome by clamping directly in a steel vise.
Losing small parts like backup rings or O rings.
Skipping cleaning – contamination ruins new seals.
Not relieving pressure first – risk of injury.
Conclusion
Learning how to disassemble a hydraulic cylinder is a core skill for anyone maintaining hydraulic equipment. From relieving pressure and removing the gland to extracting the rod assembly and stripping old seals, each step protects the hydraulic cylinder from unnecessary damage. Whether you work with a hydraulic piston cylinder, hydraulic ram cylinder, hydraulic lift cylinder, dump trailer hydraulic cylinder, hydraulic cylinder for scissor lift, or hydraulic cylinder for forklift, the basic disassembly procedure remains the same. After disassembly, follow our guide on how to bleed a hydraulic cylinder to complete the service. With patience and proper tools, you can safely disassemble any hydraulic cylinder and prepare it for rebuilding or seal replacement.